Makeup for Older Women: My Fabulous Manhattan Makeup Tutorial
Discovering new makeup brands is always fun. Join Margaret in a demonstration of her newly acquired Manhattan products and find out if they can work for you. Enjoy the show and check out the links to the mentioned products at the end of the article!
Good morning, everyone. I’m Margaret Manning, your host at Sixty and Me. We are a community of women over 60, who are living their life, in this time of transition, with passion and verve, appreciating the things that we can do to make ourselves look as good on the outside as we feel on the inside.
Once in a while, I do a makeup tutorial, hoping to inspire you to play with makeup regardless of your budget, your style, or your usual inclination for it. There are many new products and techniques that can help you make it a really simple process that brings you joy.
Today I’m going to use a product line that I recently discovered here in Switzerland. It’s called Manhattan Cosmetics, and I know you can get it in Germany and other parts of Europe, and you can order it online if you’re in the States.
You may wonder why I chose this company, seeing that there are a lot of wonderful brands out there that sell the classic products we’re used to. We’ve all experimented with beautiful product lines over the years, spending lots of money on lipsticks and eye products that we love to this day.
Very often, though, the innovation happens in the affordable product range so that younger people who don’t have a big budget can actually have fun with makeup and create their unique style. I’ve noticed that there are many new products out there as well as interesting techniques that I’d like to share with you.
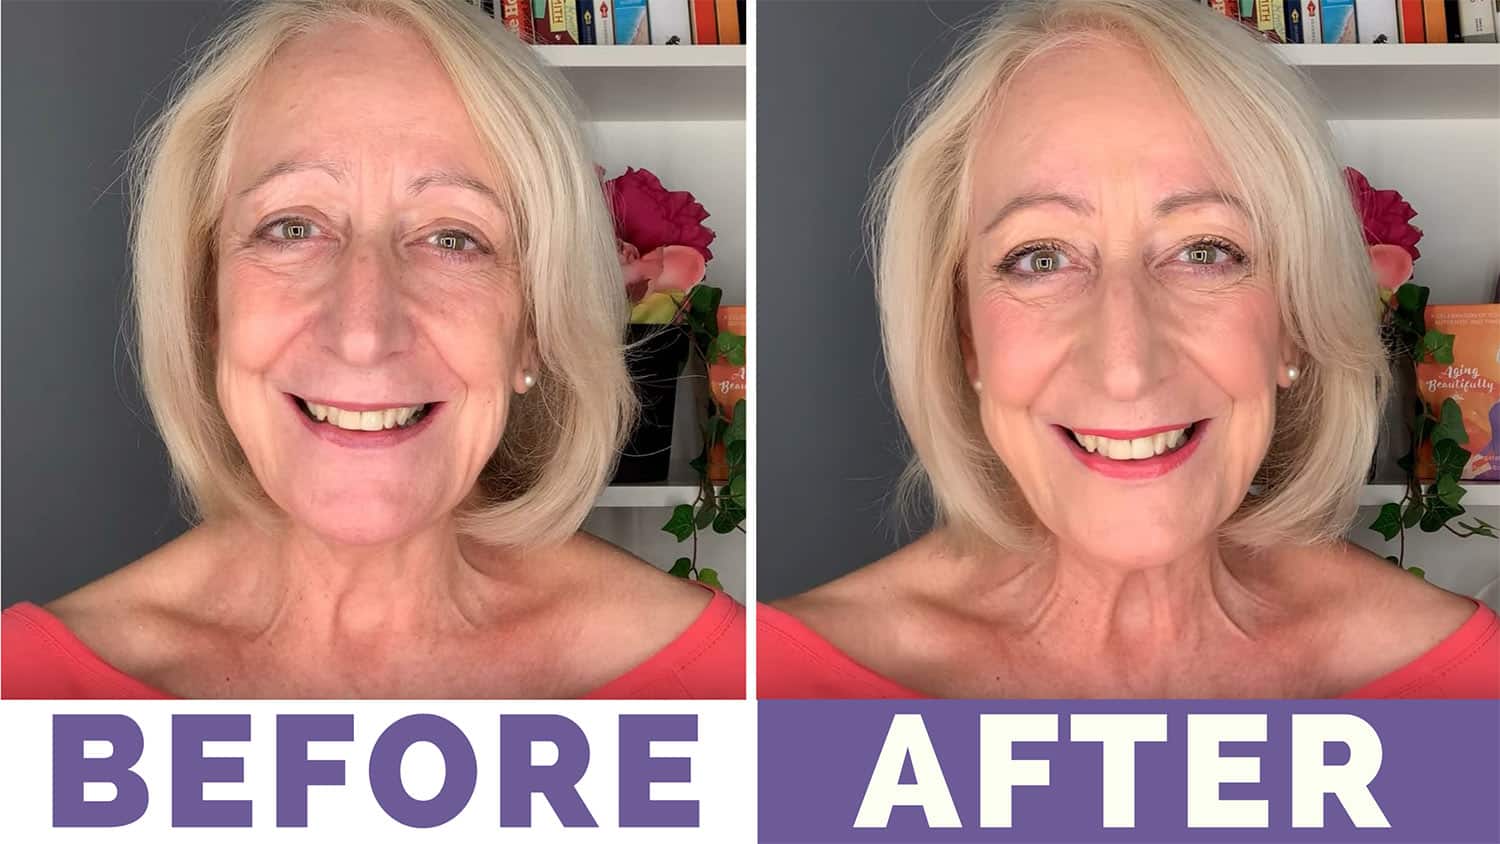
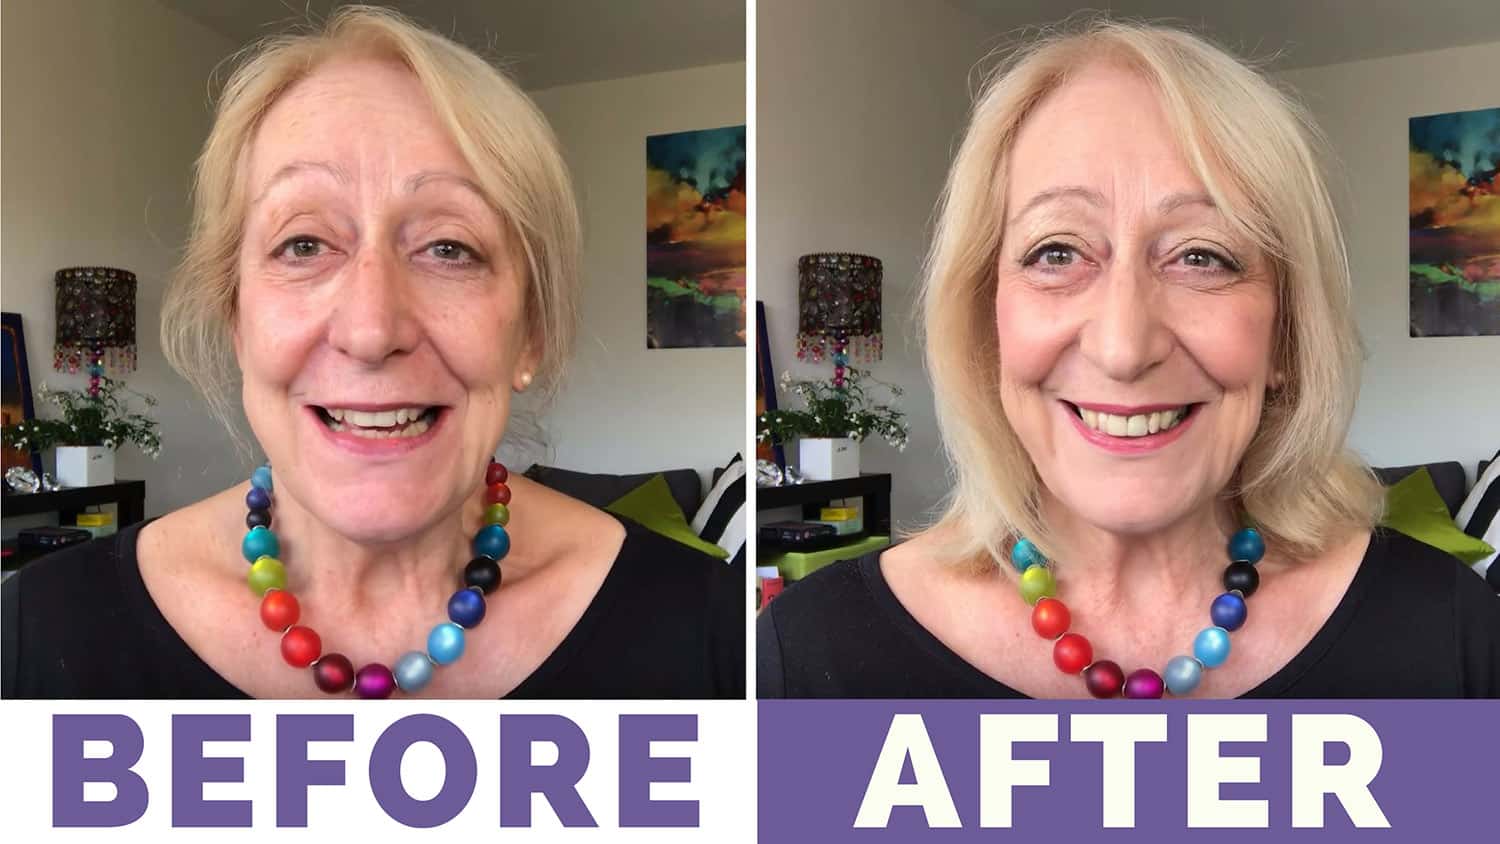
So, I start this demonstration with no makeup on, though I have already applied my facial oil. This oil has been my go-to product for a long time. It’s called Growing Younger Gracefully by Sheena Sarles. I picked this up when I was in Bali as she lives there for part of the year.
I’ve tried many other oils, but I love this one the most. I always put it on first and let it settle for a few minutes, which leaves my skin ready for makeup.
Then I always use a primer. Another budget line I’ve used is Catrice, and they have a very good primer called Prime and Fine. It used to be in a little tub, but now it’s in a plastic bottle.
I put a little of it on as a base because we all know aging skin tends to get a little drier, and it’s nice to have a base that moisturizes the skin and smooths and fills the fine lines around the eyes and other parts of the face. Then I leave my primer to settle for a minute before I apply the foundation.
When it comes to foundation, I use a lot of different kinds. I didn’t pick up one from the Manhattan line, so I’m going to use one of my favorites – the Infallible 24-Hour Matte by L’Oreal. I love this particular foundation because it’s not too thick.
They carry a much thicker version called Total Coverage which I use when I need to look almost flawless, like when I do interviews and have to be on the camera. It’s too thick to use when going out though, so I just stick with the Infallible 24-hour Matte, like I am going to do now.
The tone I use is sable sand, and though I may sometimes use a brush, like those Ariste brushes, I usually apply my foundation with my fingers. I cover my whole face, including around the mouth and the eye lids since I don’t use an eye primer.
You have to be gentle when applying foundation, so don’t pull your skin too much. I tend to get a bit carried away sometimes, especially when I’m in a hurry, but it’s best to do it slowly, with a mirror and great light.
Sometimes I pay more attention to age spots that have developed over the years and cover them as well. I also use foundation on the parts of my face that don’t have any wrinkles, just to give them a glow.
So, that’s my foundation.
When I browsed the Manhattan products, I saw they got this really cool new range called Insta. I picked up a glow from it called Strobe and Highlight. I know a lot of people might use it on their cheeks or up above their eyes, but it says you can apply it anywhere on your face for a glow.
Even though my foundation is really light, I tried this glow over it and it had a nice softening effect. It’s a very inexpensive product that cost maybe about five dollars. I’m going to put a small amount of it on top of my foundation and blend it in. It’s really nice that the glow can be noticed almost right away.
There are some really lovely branded products like It cosmetics and others that provide a similar look when you combine a foundation with a glow. Your skin really looks shinier, relaxed and natural.
Now that I’m done with my foundation and glow, I’m going to do my eyebrows because they really are very thin. I’m using an eyebrow brush by Trend Up, which is another budget line. It’s a taupe color that goes really well with my skin tone and hair color.
There are many different eyebrow products available on the market to help fill in your brows and give them the right color and shape. The technique is very easy to follow too: start by brushing your brows down, then gently fill them in to get the effect that you need. Already my brows look very natural.
You can also try products like Wonder Brow which do an amazing job painting on a color that stays forever. But they’re expensive, so I think my Trend Up is just fine for day-to-day use, and it lasts for the day.
With eye shadow, I found a lot of interesting combinations at Manhattan, but I loved their new green color. It’s got a green with a silver green highlight. I’ve never really tried those colors before, but I’m just going to have fun with them and see what happens.
These cheaper product lines always experiment with new things, and I feel inspired to try them, especially as I spent only about $50 for all the products that I’m showing you here.
I really wanted to try the green because I have hazel eyes, and I wanted to see the effect of matching the shadow to the eye color.
According to the instructions provided on the back, the first color to use is the lightest one, which should be applied just above the eye crease. I was a bit hesitant to use it at first, because it’s a bit sparkly and that’s not recommended for older skin as the light catches in all the wrinkles. But I’m trying it anyway.
Next comes the lighter green color which is a really pretty moss-like green suitable for spring. Put that all over the base of your eye. If you don’t like how it looks, you can always wash it off, so don’t be afraid to play around. Makeup shouldn’t be difficult or high-pressure. It’s all about having fun with it.
We follow up with the next touch which is this darker green shade. You might want to use a different brush for it, but I’m not going to for this demonstration. Take a bit of the darker green and put it on the crease of your eye.
Blend it in a little without pulling too hard, and then apply a teeny bit at the outer corner of the eye. That’s pretty much all you need to do with this darker green.
I know green isn’t a usual color for most of us, but I think that every now and again, you’ve got to go outside the box of comfort and try something new. When you don’t want to spend a ton of money, these kinds of products, like the Manhattan line I’m showing you today, are fun to experiment with.
They also have this silvery-grey color that should be applied between the eye crease and the brow bone. I’m going to do what they suggest, though I think it just gives a bit of sparkle which I wouldn’t normally use. I would also spend a bit more time blending it in so it’s not quite so defined.
Moving on to mascara, Manhattan has this very cool one called Volume Shake. Now, I know that it’s a challenge to apply mascara when it gets clumpy and dries out, but this one is liquid inside and you need to shake it every time you use it.
It’s got a nice volumizing brush which is exactly what we need when we get a little older and our eyelashes start to fade. Take some mascara and pop it on. If you’re like me, and you’ve done this a gazillion times in your life, then you could probably do it in the dark too.
When you apply mascara, just go down to the base of the eyelash and move up from there. Many people suggest that you do it 20 times, but I’ll just do it until it feels right. It’s a wet mascara, so you can actually feel it as you go on, and I think that’s kind of nice.
I did actually wear this mascara yesterday and you do have to work at getting it off though it’s not waterproof, so it’s really a nice one. That’s all I’m going to do with my eyes, and I think it’s a nice combination.
Next comes blush. Manhattan carry about four colors of blush in their range, and the one I picked up is a peach colored one called Secret Lovers. They have great names too, to catch the attention.
So, I take a blush brush and apply it high on my cheek bone. It’s got a nice pigment, but I should say this one didn’t last quite as long as I expected it to. I tend to smile a lot though, so perhaps I smiled it away.
I sometimes go a little overboard with blush because I love it. I really think it makes your whole face come to life. If I do put too much, I might use a translucent powder on top to calm it down a bit. That’s a nice blush though.
Moving on, I found an interesting product in the Manhattan Insta range. They call it Contour and Conceal. I don’t normally use much (if any) concealer under my eyes because I’ve got bags and wrinkles, and I accept them as perfectly normal.
In fact, I’m happy to be a 70-year-old woman who’s done – and is still doing – a lot of smiling in her life. I’d rather have more smiling and less concealer than more concealer and less smiles.
This concealer is rather dark. According to the instructions, it’s used for contouring, but if it’s the right color, you can use it as a concealer as well. It comes with an application brush that’s really nice.
When I tried it in the shop, I thought it looked too dark, but once you blend it in, you don’t see the bags and wrinkles as much. It really does a nice job, and you can use a bit more if you think it’s necessary.
Ariane Poole, the makeup artist who works with Sixty and Me, says that we always tend to make the mistake of using light color concealers underneath our eyes. This one is dark so it’s okay to use, and blending it in gives a good effect. Somehow that darkness really helps.
So, I’m done with my cheeks, eyes, eyebrows, and foundation. Next come the lips, and I love doing my lips. I think lipstick really brings your face to life.
First, I will put on my lip liner, and then I’m going to show you the Manhattan lipsticks. The liner I use is a pink one, #309 by Kiko, and I don’t just line my lips, but I also fill them in. The reason why I do that is because my lips can’t hold lipstick for very long, but the pencil stays so I have at least some color.
My technique with lipstick is to apply a matte one first. Manhattan has one called Stay Matte, which comes in about 10 different colors. Beware though, because this gets really dry really fast, so you’ve got to be very careful when you put it on.
I use a couple of different matte lipsticks but this one from Manhattan is as good as any. In fact, it’s creamier than most which is nice for a matte lipstick because you get that firm color that is really light without your lips feeling sticky. For comparison, I use another matte lipstick from Hooda, which is great but five times as expensive.
The next thing I will do is put some gloss on just to make it feel a little lighter. This Manhattan gloss is called Oh My Gloss. I’ve picked a pink color, it’s lightweight and not overly glossy. When I use a matte lipstick, I almost always use a gloss as well, because it looks and feels lovely.
So, this is my Manhattan look. To summarize, the Manhattan products I used for this demonstration were the Insta strobe and highlight over my foundation, the eyeshadow palette, the lipstick and lip gloss, and the beautiful Secret Lovers blush. It’s a fun look that cost under $50 dollars.
Have fun with makeup. Let it be an expression of your inner personality. Use techniques that are good for aging skin. Be sure you use primer, and perhaps a facial oil, that gives you a nice place to start with. I hope you enjoyed this look. Thank you for watching.
Here are links to some of the products I used in this video:
Facial Oil: Growing Younger Gracefully
Primer: Catrice – Prime and Fine
Foundation: L’oreal Infallible 24 Hour Matt
Highlighter: Manhattan Insta Strobe and Highlights
Eyebrows: Trend It Up – Taupe
Eyes: Manhattan Eyemazing Effect Eyeshadow Green Peace
Cheeks: Manhattan Powder Rouge – Tender Touch – Secret Lover
Concealer: Manhattan Insta Contour and Conceal Taupe
Lip Liner: Kiko #309
Lipstick: Manhattan Stay Matte Liquid Lip Color
Lip gloss: Manhattan Oh My Gloss Pink
What’s your favorite makeup line? Have you discovered any new brands recently? What do you think of Manhattan cosmetics? I’m eager to read your comments and have a chat about all things makeup!