


How to Make a 3D Paper Pumpkin
Paper crafts are a wonderful way to make decorations for your home. This article offers two interesting paper pumpkin designs. Enjoy and share your craft ideas!
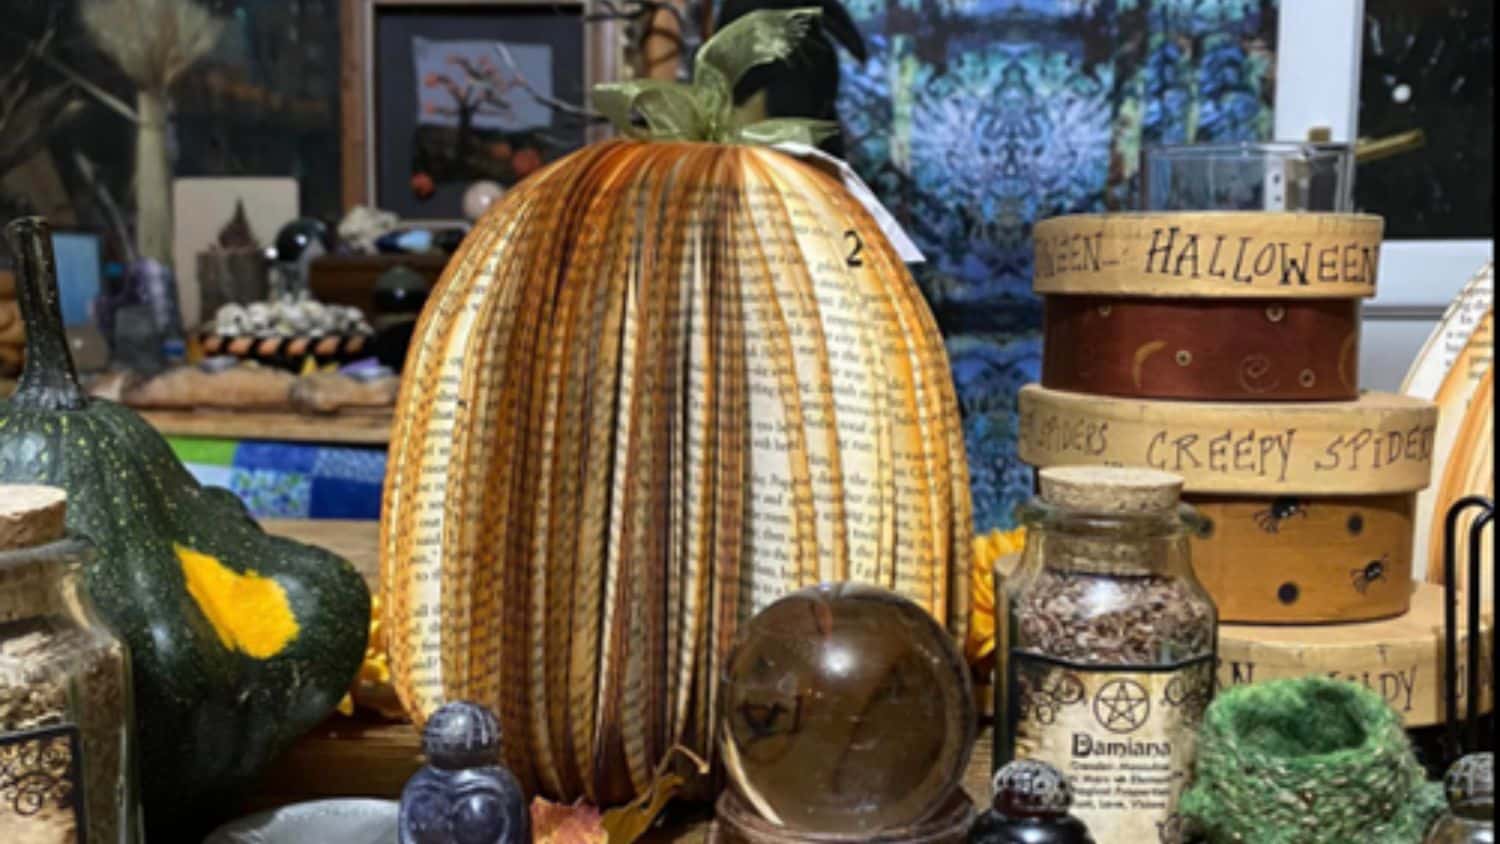
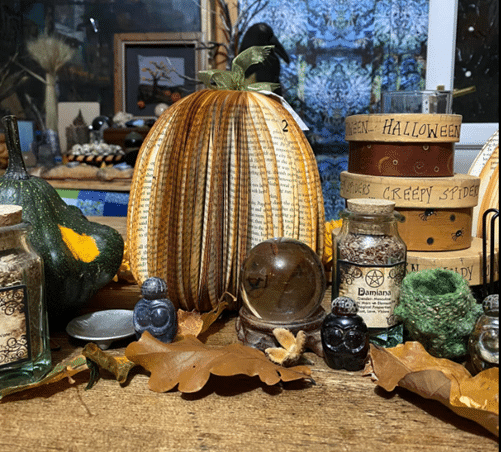
Vintage Book Page Pumpkins
These 3D vintage book page pumpkins are easy to make and add a touch of class to your Halloween decor. When books are damaged and would otherwise be sent to landfill, what better way to honour them than by making them part of your seasonal decor?
Old manuals and out-of-date textbooks work well as they have reached the end of their useful life. Ask friends to save them for you or contact thrift stores who would otherwise throw away old, damaged books – because you can give them a new lease of life!
Note: All images are courtesy of Enter the Wildwoods.
Materials You Need
- Old paperback book (or a hardback book with the cover removed)
- Craft knife suitable for paper crafting
- Scissors
- Orange watercolour paint
- Orange chalk or pastels
- Green ribbon (optional)
- Green craft paper
- Permanent marker
- PVA glue
- Two large paper clips or pegs
- Short twigs (to use as ‘stalks’)
- Hot glue gun and glue or Krazy glue
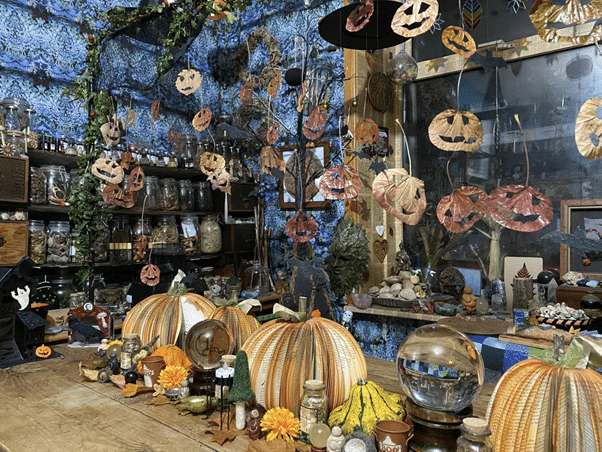
You can make pumpkins of different heights and widths – in fact, for a good table or mantel display this is very effective!
What to Do
- With the book closed, draw a curve from the top to the bottom of the book with the permanent marker. When this curve is cut, and the book is opened fully you will have a 3D circular pumpkin.
- Personal preference comes into play here. I use scissors but many people like to use craft knives to cut into the paper. If you are using a paperback book, cut the marked curve. Then, using the already cut cover as a guide, cut through the layers of pages. I like to use scissors to cut through several pages at once.
- Keep cutting until you have cut all of the pages along the curve, including the back cover.
- Now comes the fun part! I decorate the pages by stroking chalk or pastel across them, to give an orange tint. Now and again (again, according to preference) use orange, yellow or even olive-green watercolour paint to colour-wash a page to add variety. When you paint a page, remember that it will be damp so leave the book propped open to dry so the pages do not stick together.
- Cover the front cover in a layer of PVA glue – use a thin coat so the glue does not run.
- Open the book so the pages fan out and stick the front cover to the back cover. Use the paperclips or pegs to hold the covers together as the glue dries.
- Cut simple leaf shapes from green paper.
- Using a blob of glue from a glue gun or a blob of Krazy glue, attach your stick ‘stalk’ to the centre of your pumpkin, so it sticks up vertically.
- Glue your leaves to the stick for effect.
- You can add a green fabric ribbon to the stalk on some pumpkins for extra effect. Alternatively, curl green parcel ribbon and tie it to the stalk to look like tendrils. The important thing is to customise these pumpkins to make them your own!
Read more about the glories of Autumn here: THE AUTUMN QUEEN, A FABLE.
Paper Strip 3D Pumpkins
This simple craft (you can even do this with the grandchildren!) uses strips of paper to make gorgeous 3D paper pumpkins that can be used as place settings, table decorations, or even Halloween greeting cards with a twist!
Materials You Need
- Orange craft paper
- Green craft paper
- Green paper for leaves
- Scissors
- Bradawl or knitting needle to make holes in the paper strips
- 2 split pins per pumpkin
What to Do
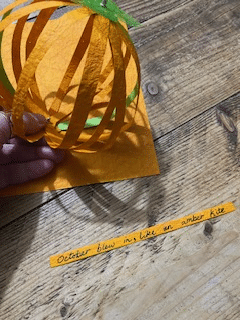
- Cut paper into strips. They don’t have to be the same width or colour – in fact, variation makes your pumpkin more interesting. But they do need to be the same length.
- Arrange your strips in a circle, where strips meet in the middle. Pierce the ends of the strips carefully with the knitting needle/bradawl and poke the closed split pin through the hole so that the ends of the strips are joined as shown in the photo below. When all the strips are in place, open the split pin to secure the strips.
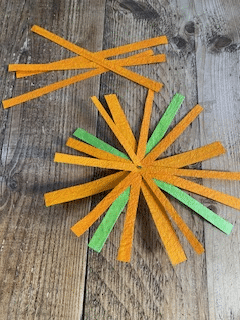
- Pierce the other end of the strips carefully with the knitting needle/bradawl. Draw each strip up and poke the closed split pin through the holes again. Open the split pin to secure the strips. Your pumpkin is starting to grow!

- You can add as many strips as you like, and vary the colours. Experiment and play with your designs. You could use patterned or textured paper, for example. As a variation, you can write phrases on the strips before you add them – maybe a favourite autumnal poem, or some of your own writing. You could also write words you associate with Halloween, or the names of guests at your party!
If you have a go at making your own 3D paper pumpkins, we’d love to hear about your experiences and see your photos, so please share them here in the comments and on our Facebook page.
Let’s Have a Conversation:
Have you ever made your own paper crafts or book crafts? Do you make your own Halloween decorations?
Tags Arts and Crafts


Would have been better if you had this on video instruction.