


How to Paint Mason Jars
Creating décor and handmade gifts with mason jars (or ‘Mason’s jars’ as they are known in our house due to a certain grandson called Mason…) has long been a beloved pastime for crafters. They’re the perfect canvases for creativity – budget-friendly, recyclable, and immensely versatile.
Painting mason jars is a lovely way to create personalised and customizable decor for any occasion, from weddings to baby showers, garden parties to barbecues and every seasonal occasion from sparkling-snowy jars at Christmas to dark mysterious jars at Halloween…
What You Need
- Mason jars (variety of sizes)
- Acrylic paint (including pearlized and glitter types)
- Paintbrushes (variety of sizes)
- Painter’s tape (optional; useful for creating designs)
- Stencils (optional)
- Mod Podge to seal
- Rubbing alcohol
- Paper towels
The Process
1. Preparing the Jars
Clean your mason jars thoroughly. Remove any labels or adhesive, then clean the entire surface with rubbing alcohol. Don’t skip this step; it ensures that the paint adheres well. Allow the jars to dry completely before moving on to the next step.
2. Choosing Your Colour Palette
Acrylic paint is a great and cost-effective choice for painting on glass. It’s versatile and easy to paint with, due to its consistency. You can find a wide variety of colours at any craft outlet, including pearlized and glitter paints. It’s also easy to mix unique shades.
Think about the colours you might need – hot or cool shades; colours associated with the seasons, or mixing colours to match your décor or theme.
3. Attaching Stencils or Masking Tape
If you want to create patterns or create stripes of colour, use painter’s tape to mark off different areas. You can also use tape stencils onto your jars to create designs. In both cases, do not remove the stencil or tape until the paint is completely dry to avoid smudging.
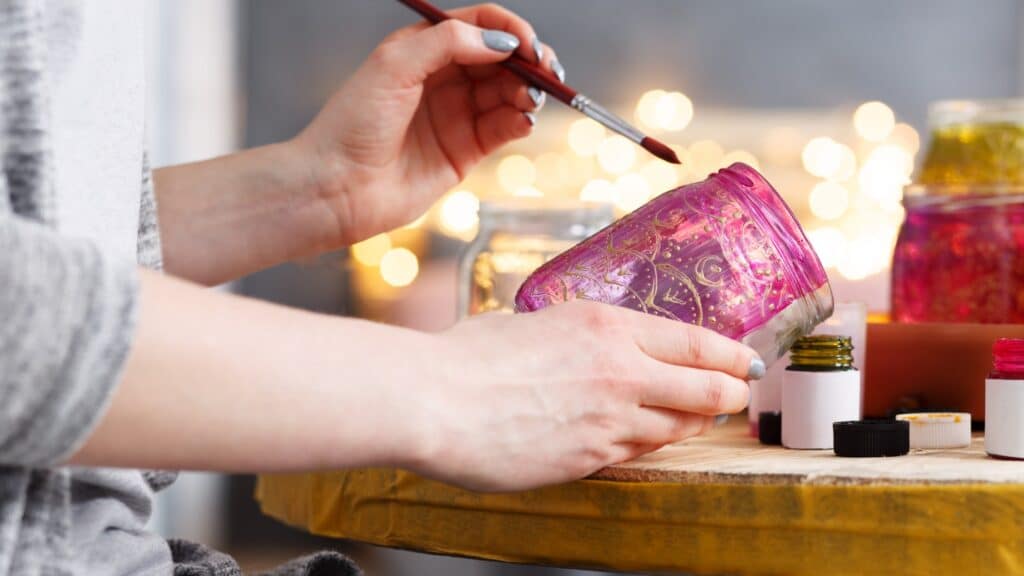
4. Applying Paint
Apply your paint in thin, even layers. You can create a most effective and neater finish by building up thin layers rather than trying to apply one thick coat – it never, ever works! Allow each layer to dry completely before applying the next.
This process takes patience, but if you paint your jars in batches, you have something to do while you wait – and adding paint in thin layers and allowing drying time will give you the most even and professional-looking results.
4. Sealing the Paint
Once your final paint layer is completely dry, it’s time to seal your jars. This will protect the paint from chipping or scratching. Apply a clear sealer or Mod Podge in two thin, even layers, allowing each to dry completely before applying the next.
Painting mason jars is a fun, simple, affordable and accessible way to bring a splash of colour and your own unique flair to any event or seasonal decor. With a little patience and a dash of creativity, you can fill your world with colour, one mason jar at a time.
Design Ideas for Painting Your Mason Jars
Life’s a Beach
Paint your jar in a shade of aqua with white ‘wave crests’ created by a swirl of a brush and a touch of glitter. After painting and sealing, paint an extra layer of Mod Podge round the bottom of the jar and dip it in sand. Glue the top of the jar and wrap rustic string around it. When dry and secure in place, tie on a couple of shells, hag stones or a dried sand dollar.
Message on a Bottle
Instead of painting your mason jar with standard acrylic, use a chalk paint and tie string round the top with a loop for a piece of chalk to leave family messages. It’s mason-jar-love-language!
Catch a Falling Star
Paint your jar at the bottom with black acrylic paint and add a swirl of silver stars (hand painted, stencilled or with tiny glow-in-the-dark stickers) above this, leaving the top clear and unpainted. Wrap rustic wire round the neck and coil a piece up into a half-moon curve. Hang stars made from wire, paper or card from the wire curve with clear fishing line so they dangle. Add a battery tea light to the jar for a lovely evening glow.
Vintage Village
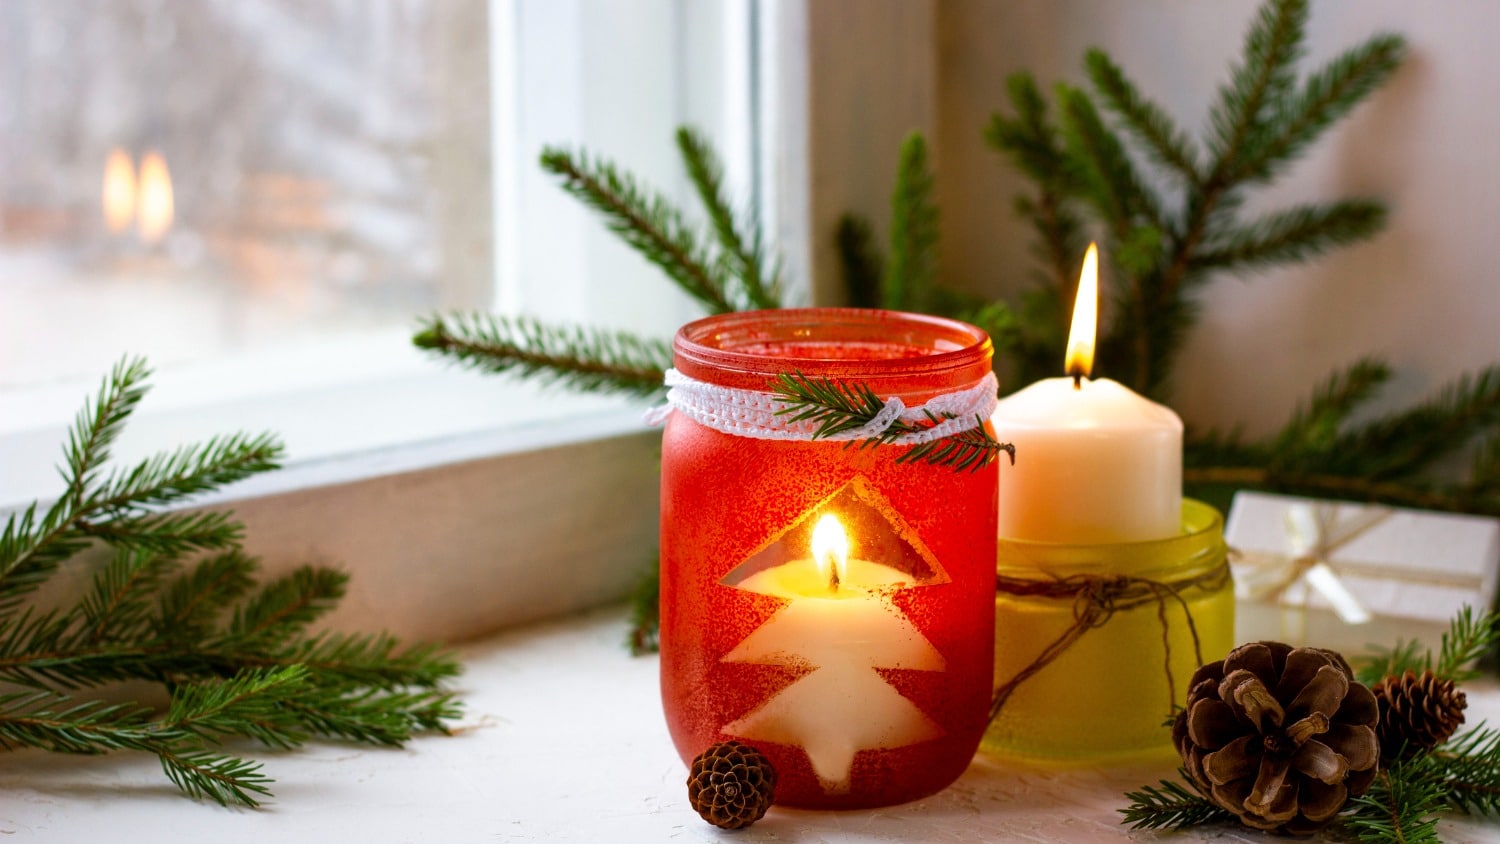
Paint a collection of different sized thrifted mason jars in festive red or green, then hand paint or stencil around the bottom with a strip of houses or fir trees in white. Add fine touches of glitter before sealing and add a glow stick or battery tealight for a Christmas window ledge display.
Butterfly Beauty
Place small, cheap butterfly stickers on your mason jar and paint it in a summer colour (or do several in a range of summer hues). When the paint is dry, remove the stickers carefully to leave unpainted butterfly shapes. Tie a ribbon round the neck of the jar and pop a battery tea light inside for a flickering table decoration for those balmy summer evenings with friends.
Halloween Hootenanny
Paint your jar in ombre shades of orange from dark to pale and paint a witch on a broomstick freehand – or add a vintage Halloween sticker. Tie black raffia or ribbon round the neck and add a charm for extra decoration.
Candy Corn Collection
Paint your collection of mason jars of different sizes in stripes of orange, yellow and white by masking each section with tape before painting and leaving it to dry thoroughly before removing and repeating with the next colour.
If you prefer a less sharp, rustic finish you may want to freehand paint your stripes and stipple the finish between each stripe (pat the brush end gently on the colours to mix them slightly). When the paint is dry and sealed, tie a checked orange and black ribbon round the neck of the jar.
Falling Leaves
Paint your mason jar in a fall shade (or shades) and decoupage dried pressed leaves or leaf skeletons around the bottom. Tie a burlap ribbon round the neck and add a sprig of berries (real or artificial) for extra autumnal goodness.
Read WHAT IS DECOUPAGE: A BEGINNER’S GUIDE.
Frosty and Bright
Paint your mason jar by using a small sponge dipped in white paint – one layer only. Add glitter paint by flicking some from the tip of a small paint brush and leaving it to dry. Seal the jar, and when it is dry tie white ribbon round the neck and add a small die cut snowflake to each end of the ribbon. Pop a battery tea light inside for a beautiful table decoration.
Wedding Wonders
Paint the bottom third of a mason jar white or cream (according to the bride’s dress) and leave the top two thirds of the jar clear. When the paint is dry and sealed, glue a strip of cotton lace round the jar at the top of the painted section. Tie raffia and glue tiny sprigs of artificial flowers or ferns round the rim. If using your jars as table settings, add names on tags cut from vintage book print mounted on white/cream card.
If you have a go at painting mason jars, we’d love to hear about your experiences and see your crafting photos, so please share them here in the comments.
Let’s Have a Conversation:
Have you ever decorated a mason jar for the holidays? How did you do it, and what challenges did you encounter? Do you prefer using vintage mason jars for crafting, or shiny new ones – and why?
Tags Arts and Crafts
Thanks for these clear step-by-step descriptions how to create a variety of decorative jars. I think it will be fun to do this with a group of friends – a ” Mason jar painting party!”
I’m so glad you enjoyed the article – a Mason jar painting party sounds like a great idea!