


How to Punch Needle: A Beginner’s Guide
Whether you’re a seasoned crafter searching for something new or a newbie looking to explore an artistic outlet, punch needle offers an enchanting experience that keeps you hooked. This ancient embroidery technique has resurfaced in the modern crafting scene, charming beginners and experts alike with its simplicity and stunning results.
In this beginner’s guide, I’ll walk you through every step of the punch needle process, from gathering essential materials to exploring project ideas and mastering the technique. So, if you’re ready to unleash your inner artist and create beautiful, textured masterpieces, let’s get started!
What You Need
Before we dive in, gather up all the necessary materials. Fortunately, punch needle doesn’t require a lengthy shopping list, making it a budget-friendly hobby. Here’s what you’ll need to get started:
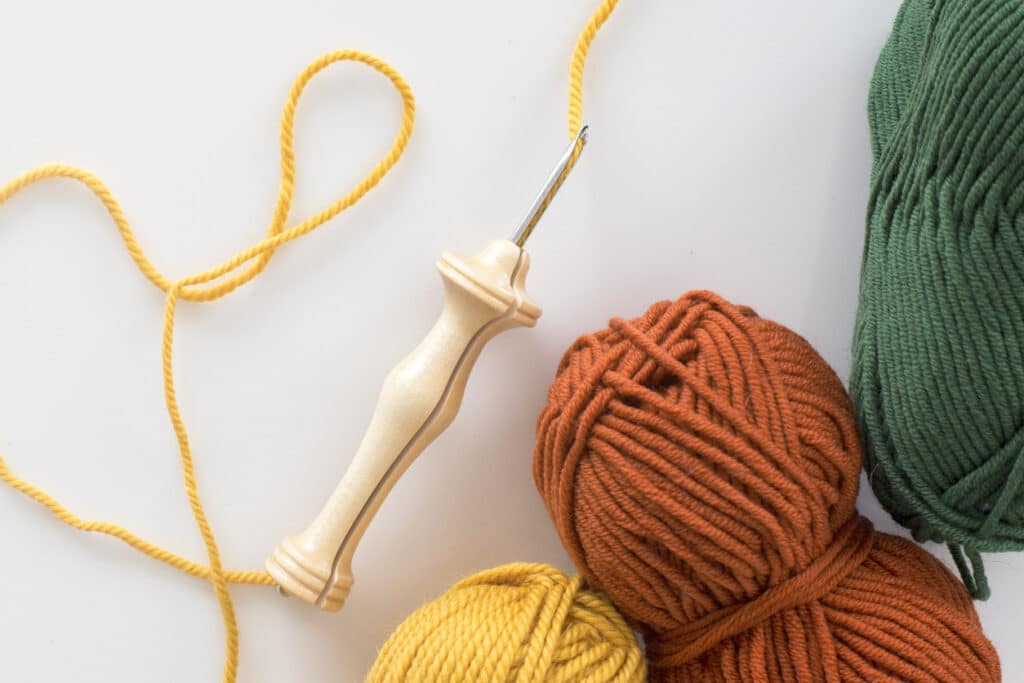
- Punch Needle Tool: This is the star of the show! Invest in a good-quality punch needle tool, also known as a punch needle pen. Choose one that is comfortable in your hand and easy to use.
- Embroidery Hoop: You also need an embroidery hoop, ideally one that’s slightly larger than your desired finished project. The hoop will keep your fabric taut, making it easier to work on your design.
- Monk’s Cloth or Linen Fabric: Select a sturdy, plain-weave fabric like monk’s cloth or linen to stretch across the embroidery hoop. The material should be tight enough to support the tension of the yarn but not so tight that it distorts the weave.
- Yarn: Opt for rug or bulky craft yarn suitable for punch needle projects. Experiment with textures and colors to create varying effects in your designs. Acrylic, wool, and cotton yarns are popular choices.
- Scissors: A pair of sharp scissors is a must for trimming yarn and finishing your project.
- Transfer Pen or Pencil: This is to sketch your design on the fabric before you start punching. You can use washable transfer pens or a regular pencil for a temporary sketch.
- Needle Threader (Optional): If your punch needle tool has a small eye, a needle threader can come in handy for threading the yarn without any fuss.
Beginner-Friendly Project Ideas
Once you have your materials ready, it’s time to let your creativity flow! Here are some popular and versatile project ideas to spark your imagination:
- Wall Art: Create stunning wall art that adds a personal touch to your living space. Whether it features abstract patterns, nature-inspired motifs, or uplifting quotes, your punch needle art will showcase your creativity.
- Pillows and Cushions: Enhance your home decor with punch needle-embroidered pillows and cushion covers. They are charming additions to your sofa, chairs, or bed and bring comfort and beauty to any room.
- Coasters and Placemats: Design and craft unique punch needle coasters and placemats to protect your tabletops while impressing guests during meals and other gatherings.
- Tote Bags and Pouches: Turn plain tote bags or pouches into fashion statements with punch needle embroidery. Express your personality through bright colors and fun designs.
- Ornaments and Keychains: Make adorable punch needle ornaments and keychains. They’re perfect for gifting or adding a fun touch to your keys.
- Garments and Accessories: Take your punch needle artistry to the next level by embellishing clothing items like shirts, denim jackets, and hats. You can even make punch needle accessories like earrings and brooches.
- Rugs and Mats: Design and craft punch needle rugs or doormats to keep your floors cozy and inviting.
Step-by-Step Instructions
Now that you have your materials and project ideas, it’s time for the fun part!
Step 1: Prepare Your Fabric
Begin by placing the monk’s cloth or linen fabric on a flat surface. Loosen the screw on your embroidery hoop, separating the inner and outer rings. Lay the fabric over the inner ring. Then, place the outer ring over the fabric and press down firmly. Tighten the screw to secure the material between the rings. You may need to pull or adjust the edges of the fabric to keep it taut in the ring. You don’t want any folds or wrinkles!
Step 2: Transfer Your Design
If you have a specific design in mind, lightly sketch it onto the fabric using a transfer pen or pencil. If you’re unsure about your drawing skills, find punch needle patterns online or use stencils for a perfect outline. Alternatively, you can work freehand for a more organic and spontaneous creation.
Step 3: Thread the Punch Needle
Now, thread your chosen yarn through the punch needle tool’s eye. Take a length of yarn, and using your fingers or a needle threader, guide it through the eye until you have an equal length of yarn on both sides of the needle. Make sure the yarn is secure and won’t slip out as you punch.
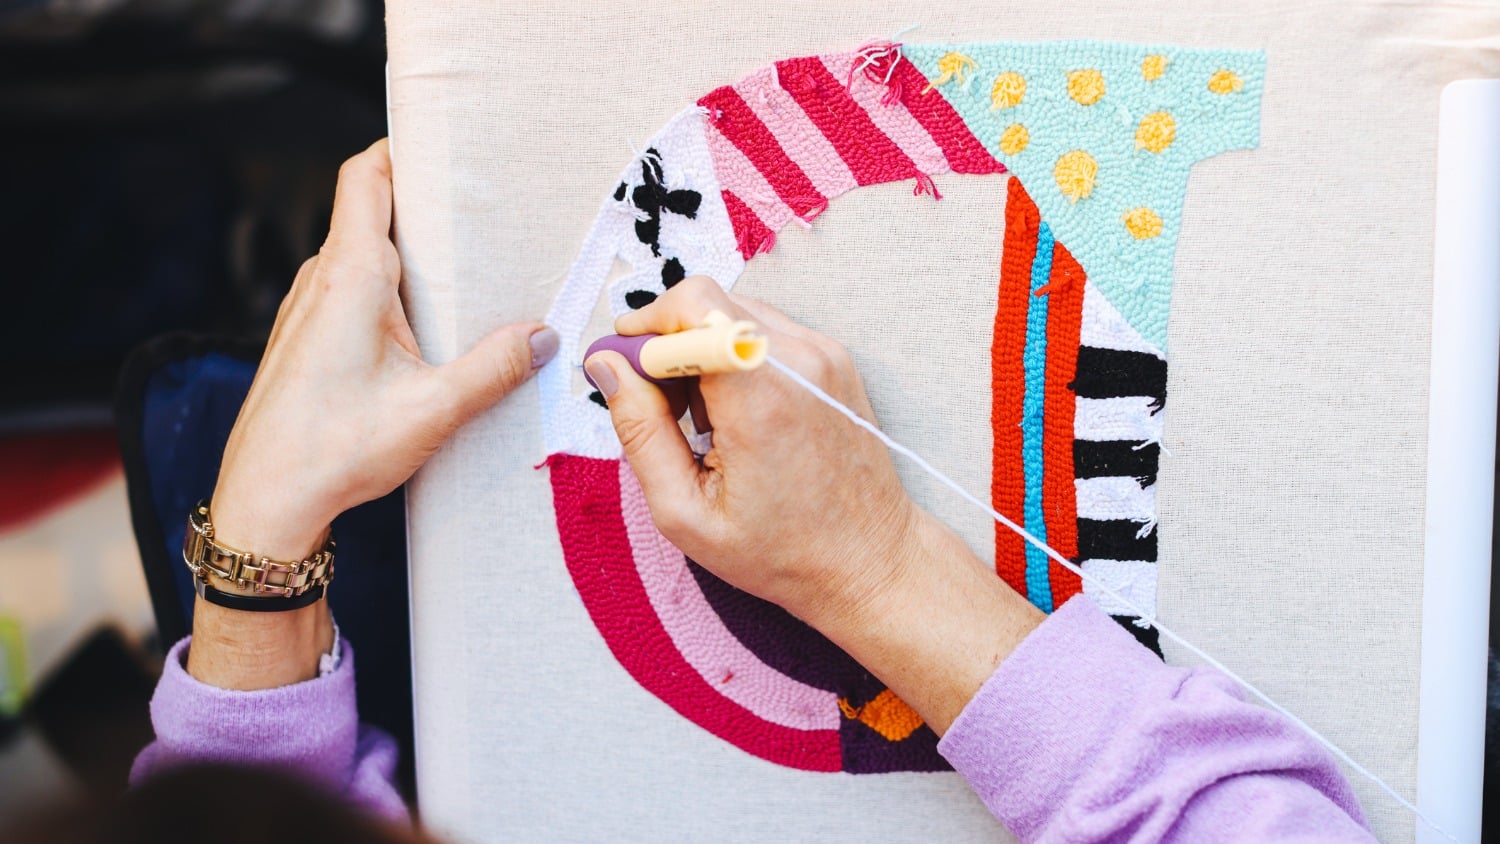
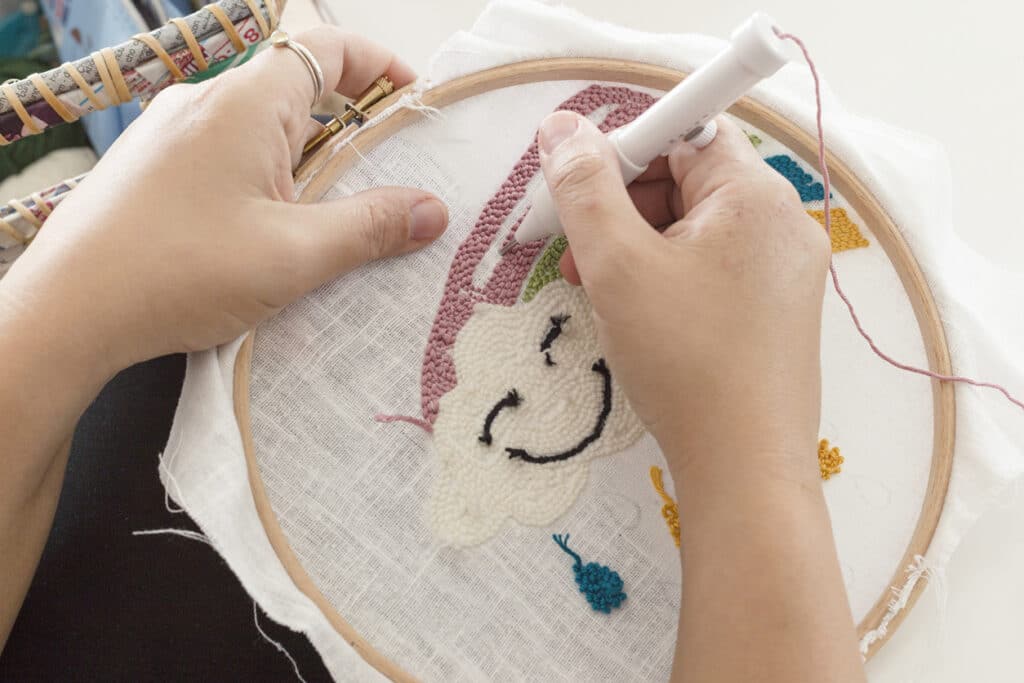
Step 4: Start Punching
Hold the punch needle tool like a pen, and place the needle on the fabric where you want to start your design. Push the needle straight down through the material until the handle is flush with the surface. Make sure the needle goes all the way through the fabric and emerges at the backside of the hoop.
Step 5: Create Loops
Here’s where the magic happens! Pull the punch needle back slightly, but not all the way out, then push it down again, creating a loop. The farther you pull the tool out, the larger the loop. This action secures the yarn in place, creating a tufted texture on the front side of the fabric.
Step 6: Keep Punching
With the first loop in place, continue punching your design, following the sketch or letting your creativity guide you. Skip two or three holes between loops to avoid weakening the fabric. You’ll notice a satisfying rhythm as you repeat the punching process. Remember to maintain a consistent punch depth as you work, and keep the needle perpendicular to the fabric for neat, even loops. Keep going until you’ve finished the outline.
Step 7: Fill in the Design
Once you finish outlining, you can start filling in the shapes by repeatedly punching within the boundaries. This “filling” technique adds dimension and texture to your project. As you experiment with different yarn colors, don’t be afraid to blend shades or use variegated yarn to create unique effects.
Step 8: Add the Finishing Touches
When you’re satisfied with your punch needle masterpiece, it’s time for the finishing touches. Flip the hoop over to the backside, and secure loose yarn ends with a needle and thread. Knot or weave the ends to prevent unraveling. Neatly trim off excess yarn with scissors.
Congratulations! You’ve just completed your first punch needle project. As you’ve discovered, punch needle embroidery is a captivating craft that combines creativity and relaxation. Whether you adorn your walls with punch needle wall art, add a touch of charm to your home with embroidered cushions, or explore the realm of punch needle clothes accessories, the possibilities are endless!
Here’s a short video to help get you started:
Let’s Have a Conversation:
Have you tried punch needle embroidery before, or are you excited to give it a shot after reading this guide? I’d love to hear about your experiences, project ideas, and any tips you may have for fellow crafters. Please share your thoughts in the comments section below. Happy punching!
Tags Arts and Crafts


My granddaughter does a beautiful job this this. That is so cool.
Excellent tutorial! I can’t wait until i can afford to buy the supplies so that i can try making a throw pillow case. What thickness of yarn do you recommend? Does the punch accommodate different sizes, or does each thickness of yarn need a different sized punch?
Thank you! ❤️
I am having trouble threading my needle I had a wire thin wire and it bends all the time I am 80 am I too old to do this
No your not too old, maybe a stronger or different punch.
Thanks for this tutorial… I’ve been curious about punch needle. What yarn length do you recommend?