


10 Ways to Use a Makeup Sponge (with Demos)
Since a number of you have requested information about how to use a makeup sponge and all the different ways to use it, that’s exactly what today’s article and accompanying video are all about. And I think you’ll be a bit amazed by the variety of things we can do with a makeup sponge!
Why Use a Makeup Sponge?
Makeup sponges create the most skin-like finish since they push the product into the skin. This means that the makeup product doesn’t sit on top of the skin and appears more seamless and natural. Makeup sponges can also help “sheer out” a thicker or creamier product, and they can build up coverage.
What’s the Best Sponge to Use?
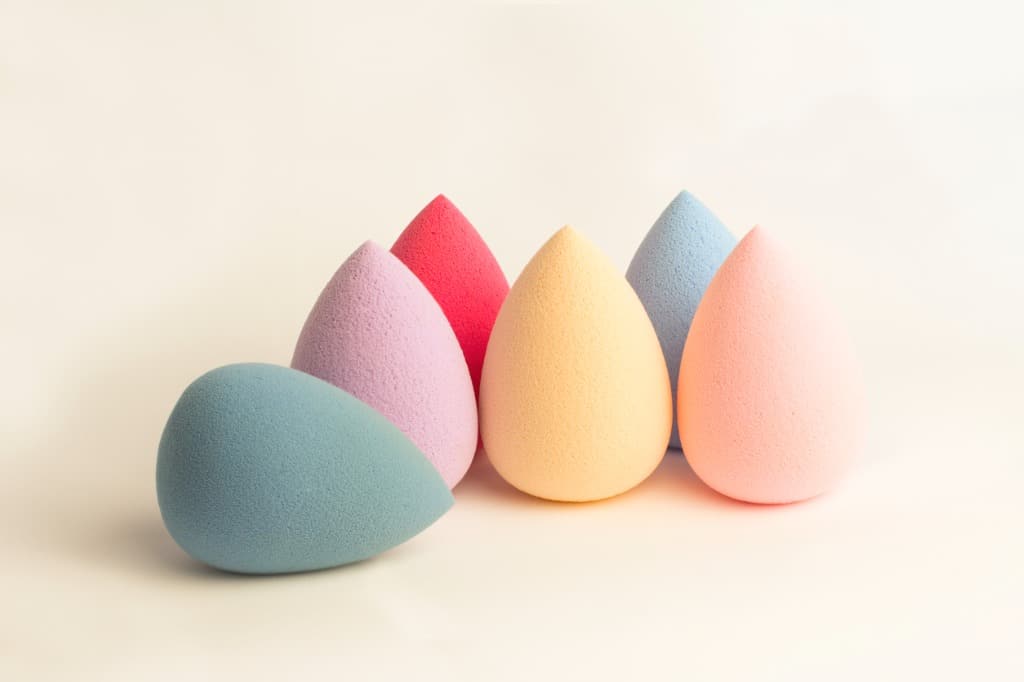
If we decide to use a makeup sponge, we need to select one that is appropriate for us. There are many different makeup sponges on the market since just about every makeup brand produces them – and they come in a wide array of sizes and shapes.
The larger size sponges are great for applying makeup to larger areas of the face. The smaller sponges are great for use on smaller areas such as under the eyes or where we apply highlighter, contour or bronzer.
Tip: If you don’t want to buy small sponges, you can simply take a paper-wrapped wire – like the ones you sometimes see around the end of bread wrappers – and tie off the end of a larger sponge.
Some people absolutely swear by the original Beauty Blender sponge. But there are certainly many other less expensive sponges on the market such as those from Real Techniques and Elf. If you can, it’s great to try both a Beauty Blender and a less expensive sponge so you can compare them to see which you prefer. Frankly, I think it really just boils down to personal preference.
How to Get the Best Results
To get the best results from makeup application with a sponge, there are two very important things we must do: first, it’s necessary to prepare the sponge for use in the right way; and second, we have to use a very specific application technique when we use a sponge.
Follow these three steps for best results:
- It’s necessary to get the sponge thoroughly wet which will actually double its size.
- thoroughly squeeze out the sponge
- Take a dry paper towel and squeeze the sponge once again so it’s still very damp, but not too wet.
I’ll demonstrate this process in the video.
Best Application Technique
It’s very important to avoid rubbing the sponge across the face. What we want to do is to bounce it to create a uniform, seamless coverage without streaks and lines. And as we bounce the sponge, we’re just barely lifting it off the surface of the skin.
Be sure to check out Elise’s YouTube channel which specifically focuses on makeup tips, techniques, and product reviews for those of us 50+. Don’t forget to subscribe!
In the accompanying video, I’ll demonstrate using a makeup sponge to apply a surprising number of makeup products. During my makeup application process, I’ll also use a variety of makeup formulas – creams, liquids and gels – so you can see how the sponge works with all these different makeup formulas.
Face Primer and Foundation
Some people like to apply the product on the back of the hand, then absorb the product into the sponge and then apply. That’s certainly fine to do, but I prefer to dot the product on my face with my fingers and then use my sponge to blend it in. I feel this application technique doesn’t absorb and use up as much product.
Concealer and Powder
I use a smaller sponge to apply under eye concealer and face concealer. To do this, I first dot the product on and then blend it in using the sponge.
To set the concealer under my eyes, I’m going to dip the small end of a sponge into loose powder and then gently press it over the concealer which will help keep the concealer from creasing.
Contouring, Blush and Highlight
Because I don’t want to apply too much contour, I’m not going to apply the contour cream directly to my face from the applicator. Instead, I’m going to put some on the back of my hand and then use a small sponge – or the small end of a sponge – to pick it up and strategically place it under the cheekbones, on the bottom edge of the jawline and on the forehead.
Using a sponge to apply contour is a great way to keep the contour looking more natural and to avoid that dreaded look of two stripes down the sides of our face.
Because I want to apply only a small amount of blush – and then build it up if I need to – I’ll put blush on the back of my hand and then apply it with the rounded end of the sponge.
Since I’m using a highlighter which is pretty intense, I’ll also apply that on the back of my hand and then pick it up with the sponge.
Eyeshadow and Lipstick
These next two applications will most likely surprise you the most. Using the makeup sponge, I will apply eyeshadow and help blend out my lipstick. I’ll apply both liquid and powder eyeshadow using a small sponge. And it’s certainly also possible to use cream eyeshadow.
To help soften the look of my lipstick, I’m going to use the sponge to tap over it. Next, I’m going to take a couple of lip glosses and combine them on the back of my hand and then dot them on my lips using the sponge.
The Finishing Touch
No matter what makeup I use, or how I apply it, I always like to finish my makeup routine by going over my entire face with a damp sponge. And you really want to push the sponge into the skin so the layers of makeup blend together. This ensures a more seamless look.
Then, if I want to keep my makeup in place longer, I’ll spray some setting spray on my sponge and pat it over my face.
Although we usually can wait a week to clean our makeup brushes, it is important to clean a makeup sponge after each use since bacteria can easily build up in it. And, it’s also very important to let it air dry.
If you’re wondering what you can do with your old makeup sponges, Beauty Blender has come up with a few tips.
They can be used to apply self-tanner, bounce away deodorant or other stains on clothes, and buff out scuffs on shoes. They can also be used as a painting tool or – if sprayed with glass cleaner – they’re great to use to clean phones, tablets or computer screens.
But I must admit that my most favorite suggestion was to use them as cat toys!
Let’s Have a Conversation:
Do you use a makeup sponge to apply any of your makeup? If so, what makeup do you prefer to apply using a sponge? Why do you feel a sponge works best to apply this makeup?

Enjoy watching your videos for techniques and products. You always look lovely. I used a sponge 40 years ago that was 3″ round and we would fold it over and over to obtain the correct shape. I don’t use them today yet my daughter and granddaughter swear by them. I’ve been using less and less makeup with age and have not found that balance between au “old” natural and an old courtesan.
Nina , Margaret has so many excellent videos on mature make up. Don’t give up make up as there’s never a better time than now to try something new.